
How to use, set up and test a webhook?
Why Use Magnétis Webhooks?
Webhooks allow you to automatically trigger an action (for example, towards your CRM) whenever a call is received on your tracked numbers, helping you connect your tools with call tracking. Unlike the API, which lets you actively fetch data, webhooks are managed by our system and notify you every time an event occurs.
If you’d like to perform actions following the reception of a call, you can also explore our Zapier integration.
Webhook Configuration
You can create webhook flows in the Organization section of the Magnétis interface. Go to: API & Connectors > Webhooks
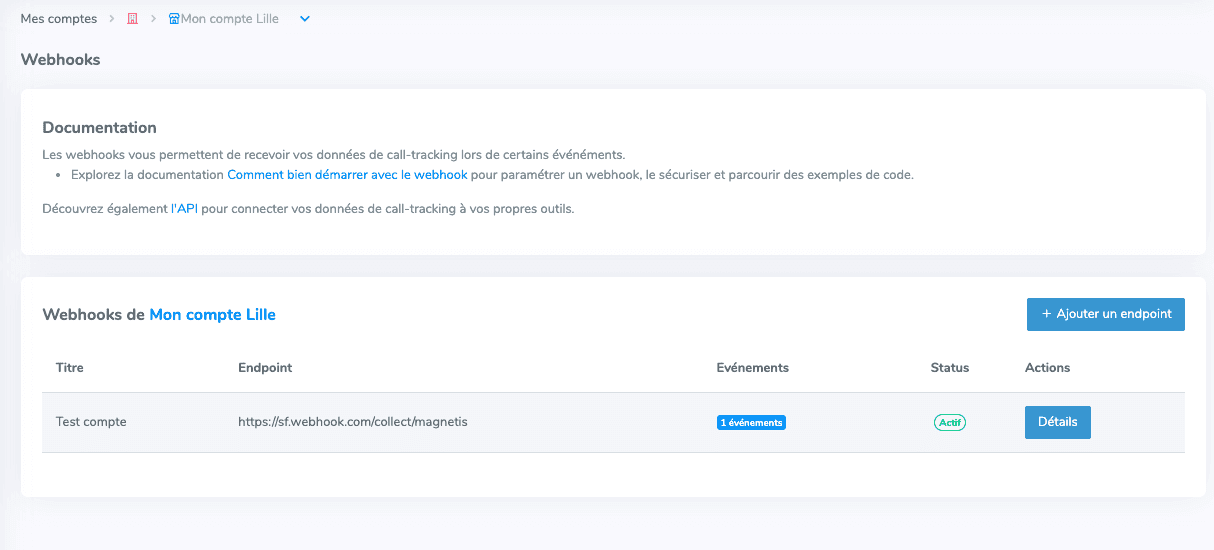
To add a new webhook, click "Add an endpoint" and fill in the following:
Title: A clear title to identify the webhook.
Endpoint: The URL address where the event data will be sent.
Events: Trigger types such as call:completed, call:missed, call:ringing, or lead:created.
Customize this event: Optional filters for specific accounts or call duration conditions.
Data Format Sent
Magnétis sends data in a structured format including call ID, account details, timestamps, caller numbers, and marketing attribution (UTMs, Gclid).
Testing the Webhook
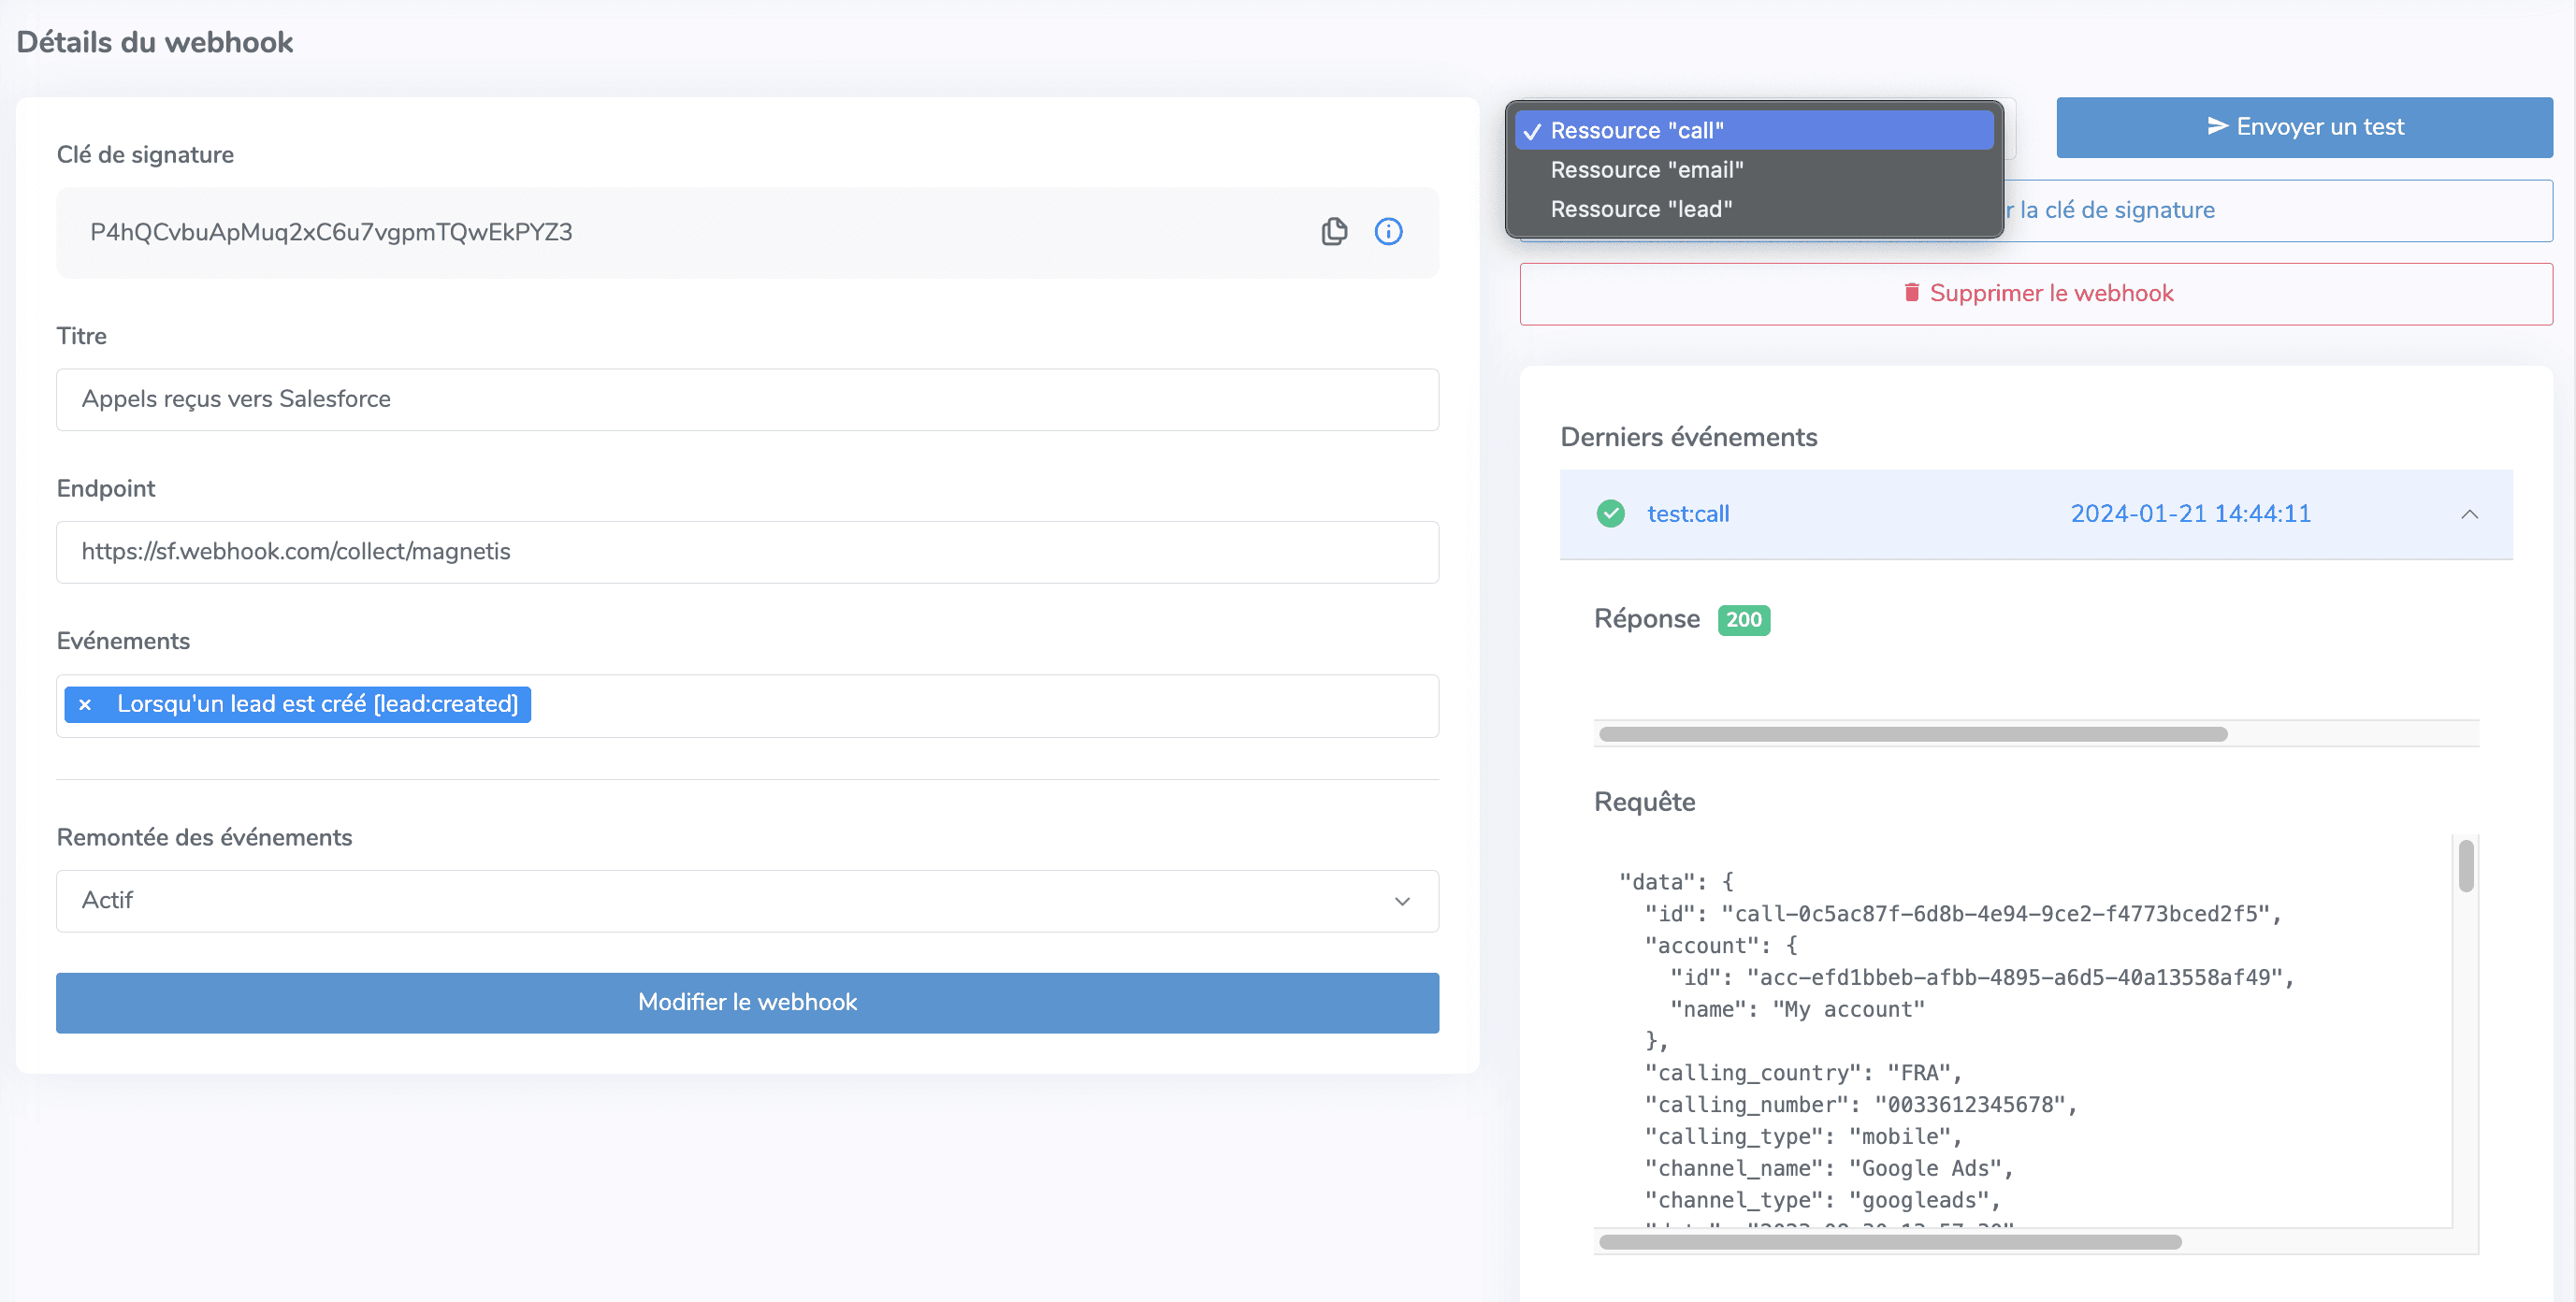
In the details of a webhook, the panel on the right allows you to test the webhook and send sample data to your endpoint. You will get the response from your endpoint, both in status and data. The last 10 attempts are displayed in the history section.
Request Signature and Securing Exchanges
Magnétis signs webhook requests via the X-CALLTRACKING-SIGNATURE HTTP header. This allows you to verify that requests truly originate from Magnétis using an HMAC-SHA1 hash with your unique signature key.
À retenir - Documentation express
Activation: Enable the webhook in the Magnétis interface and set your endpoint URL.
Events: Select which call or lead events should trigger the data push.
Security: Use the generated signature key to verify incoming requests.
Testing: Use the built-in tool to send sample payloads and check your server's response.